Sunday, February 27, 2011

Success!

Hi There!


So I wanted to put my IKEA adapter to the task of powering the Arduino. But this kind of failed as apparently it only provides 4,8V Which is of course not enough. But fear not Luck was on my side as I found out that the adapter from my Harddrive is exactly right for the Arduino.

So I tested my prototype! And it worked! :D The first day I tried it it started to turn around 7:45 and was still turning when I left around 8. And in the afternoon about 17:00 I got a call from a roommate that it was turning! So, if it stopped turning in between, it did work! But my roommate also asked if he should stop it as one of the gears pushed itself out and now it was just making a lot of noise. So he pulled the plug and the experiment stopped.


So this was the end of this.

I found out that in the code I ask it to run on 20% of all the light that it receives. So if it maps out all the received light it starts turning on the bottom 10 % and stop at the bottom 30%.


This makes it turn for a very long time (at least longer than 15 minutes) which is longer than I envisioned it working. So now I changed the code so it will only run on 5%, and we'll see how that goes.

So this is what I'm going to test this week. And then I'll stop with this experiment And wait for summer since I don't notice it turning when I'm home, Since I leave before it the sun is really up and back after the sun is down. Maybe this is more a summer experiment.


This week I will think of things to do with the speaker and see if I can make it react to different types of sensors. or maybe use it as a sensor. :)

Yeah not to brilliant yet, but hopefully it will be interesting :).


ah well cheers!

frank

Saturday, February 19, 2011

Troubles in traveling lands...

Hi...

Sorry that it took me TWO weeks to get back, but in these two weeks I started my internship in Amsterdam and I lost more time than I expected to lose, and the nights have been busier than they have been the last couple of weeks. So no time for other things, But (luckily) there is still some news.


First the prototype:

This is the prototype as I wanted to test it (you see that I wanted and apparently couldn't write 'did'?). So this is the prototype that should work when the sun goes down or up and make some nice sounds.

So first thing that I added is a 9V battery so it wouldn't need to be connected to my (awesome) laptop, since I would need it during the week. The black little box on the right is the Relay that turns the engine on.

Here is the Light sensor, which senses the light and then passes it's value on to the Arduino. (Don't worry about all the wires, they are supposed to be there and strangely enough I know what they all should do! (Actually it isn't that difficult! :) ))

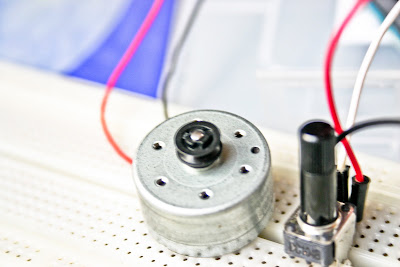
And this is the motor with a small stick attached to it. Can you see the added paper? Remember that I wanted it to sound like grass reacting on the wind? It doesn't... The engine and gears make waaaaay to much sound and the paper sounds way to sharp... but anyway it works :) it makes a sound.... later improvements can be made.

"So," you might ask "You've been at it for about two weeks. What are the results?" he... uhm... something went wrong... I was fearing it but let me show you a picture of the evil doer (not really of course, I did it wrong but i'm not willing to admit it publicly. ):


The damn battery run out of power!!!!!!!!!!! even before it got dark! so... i couldn't even test the damn prototype! .....aaaaah.... welll..... lets look around will we?

I found out that my IKEA SPoka light uses a 12V transformer that uses the right plug. Only the poles are switched around so I think i will cut the wires and switch them :) And see if it will work :). So hopefully next weeek will be waaaay better :) and hopefully successful :).


In other news: My headphones died. Yes it is a very sad happening that makes you gulp... I know... it's hard. The thing what happened was that one of the cables broke. And with my new found experience in soldering things I decided I could fix it. And strangely enough I did... But after some time the left ear (the one I fixed) started to lose some volume and I though "Well that's probably my bad soldering! :D" happy as I was, as I new I just needed to re-solder it again, I opened it up and soldered it again. Listened, heard that it was still wrong and soldered it again, and still it was wrong. So maybe there was something wrong... I tried to also solder the other speaker (You never know right?) and still nothing changed. So I switched the wires of the speakers so the left speaker became the right speaker and the other way around, And still the same speaker performed badly. So I think it is broken.


But! As I remembered reading at the Sparkfun page the Piezo speaker (the one normally in the Arduino Starter kit) is a 30 Ohm speaker.... And these speakers are 32 Ohm! So, in the future, expect some experiments with sounds :D!!!


As a closing feature I also want to show a picture of my new babies! I bought a Mint plant from IKEA and they started to grow!!!!


Ah.... look at the tiny leaves..... :D their soo cute :D ...maybe a new (g)arduino experiment??


so, good afternoon and see you next week. Hopefully with a report about the prototype :)

cheers!

frank

Friday, February 4, 2011

First prototype almost finished!!!

Woohooo!


I've seen the first magic!!! and it was... well magicall.. actually it wasn't that magical but it was cool to see :). ....

Does it make sense? no it doesn't, or at least I don't.... Damn Coffee, (Coffee is gooood) but I had to much of it....


Anyway (I seem to use this word to much lets use something else) However, I promised to show some drawings that I made:

This is a black and white drawing of a Camera (I hoped you already got that :) ) It is a copy ofa picture which i placed on the black paper using chalk and then filled in with white chalk and pencil.

This is a front and top view of a Philips tape player (How do you call these things?) and this is the drawing that took like 20 hours to complete, but I like it. I like the detail on it and the way the crayons and marker came out.


Enough with the drawings!!! and on with the prototyping (although drawing is fun to do two :) ). Remember the set up I made last week? yes? (If not check the last post) well, I found out it will not work, the motor needs way too much power to get started so it actually asked to much of my USB port forcing to shut down my beloved laptop in a rather unloving way. Luckily my laptop is fine, and I seem to be recovering from the shock as well. :)

So it was time for a new plan. I got the motor from an old CD-rom, and I still had all the other components which also included some nice gears :). after experimenting a bit I found that the easiest way to use these was just to add a stick to it that can hit into things, like bells or hollow tubes tubes. But maybe I will add some paper things, so I will sound like the rustling of the wind through a grass field :). Very relaxing :).

After trying out a couple of ways to let the motor run on 3 V I found out that the easiest way is a relay, Which I use now in this set up. Though somehow I wouldn't run on a normal digital 1, which should be a constant 5V, So maybe I'll get into that because it would be nice if I wouldn't need to use a Relay, and could just use the Arduino.

So here is the prototype:


Next I want to buy a 9V battery so I can try it out for about a week to see how well it works.


see you next week!

ciao!

frank

Friday, January 28, 2011

First Prototype

Phew!... just in time :)


So this week was unexpectedly pretty busy. but a god busy, I still needed to finish some drawings for a course. But these drawings are drawings that take about 20 hours, so it demanded more from me than I expected. Hopefully I can show it next week :).


To finish up last week I tried our all of the things that are in the package that I got. So I experimented with the tilt sensor and also with the Servomotor. Finally I ended up hooking a light sensor to the servomotor to make it move to the amount of light that is registered. (quite similar to the LED that reacted to light.)

so here is a quick show:


The thing with this experiment was that the servomotor wasn't really easy to connect, since some connections slightly failed sometimes making it hard to find out if it really worked. But I figured it out and it ended up great :). A cool aspect of this set up was that when using the self timer of my camera (it was dark so I had to use a tripod and everything :)) it flashes a light on which the servomotor reacted on. So there was a cool interaction between my camera and the experiment. (To bad I don't have another camera which could have registered the whole thing :)). It was fun :) we all had great laughs :).


But today I decided I should do something with the small motor so I did a quick brainstorm to find out ways to use this motor, and then some ideas I could make into prototypes. The first one is "the Daygreeter" which is a small puppet that will greet the sun or day when it sees it :). The greeting will be some bowing movement that is generated by the motor.

The cool program aspect is the fact that I first want to let it calibrate the light sensor on a whole day, which means that I first need to find out how to do that. This is to find the values of the total dark to the time when the sun shines the fullest. And also to find out when the sun actually rises and goes down again. Another interesting aspect is that when something goes wrong and the Arduino resets it will lose it's values, so maybe there should be some kind of continuous calibration program that will make it work the whole time. We'll work that out :).

I already made a setup of the puppet and motor:

The interesting bit is that the motor slips on the cardboard wheel, which needs to be fastened better, maybe with an elastic band or something. I'll find it out :).

Any way, I need to go again :). hopefully it was an interesting post :) and see you next time!

Frank :)

Monday, January 24, 2011

Deadlines almost done, but no worries anymore :)

Phew..... The big Deadline is done, and with success (not completely expected) since the company was happy with it :).

On Wednesday we finished the deadline, and I really want to post some awesomeness, but I can't, not yet really...

But I can post something, first of all I finished almost all the tutorials! As I wanted to more the physical interaction stuff I didn't do the communications part yet, but that will come when it will be necessary :).

The last tutorial I did is the one where a LED glow brighter according to the amount of the light a light sensor sees. But the weird thing was that the LED is glows brighter as there is more light, But who needs light when there is already light? Makes no sense right? :) So I turned it around and this is the result:

with enough light.

without enough light.

The cool thing about this tutorial is that the program first takes 5 seconds to calibrate itself and set a highest and lowest value for the amount of light which can be very interesting in future projects :).

I also started a bit with experimenting, because I still had some DC motors lying around. This DC motor in particular is a 3V motor but apparently it can also take 5V output, so I hope it will survive future experiments.

ANYWAY... I attached it to the Arduino and also attached a potmeter to control it. And guess what?? it worked!!! :D

not rotating.

rotating.

Now what i want to do is create a system where the motor can turn both ways as this might be a bit more useful. But to do this I need to buy some tin and a soldering thing... you know... that kind of thing.... bleh...

Well that's it for now.... not really impressive but at least it is progress and that is what counts right?

see you next (or actually this, since this is a late post) week! :)

cheers!

take care,

frank

Sunday, January 16, 2011

Deadlines deadlines deadlines deadlines deadlines.....

Hi there,

sorry... I didn’t really have time to do anything this week since there is a big deadline coming up with a project and I really needed all my time on it.

But hey, it was to be expected,,... and.. somethings did happen!

First of all I saw this documentary about Arduino which is really cool! :) watch it !!

Arduino The Documentary (2010) English HD from gnd on Vimeo.

The other thing that happened is that I now know what I want to do! yep that’s it now I finally have something to go for.

What I want to do is create more lively interactions. Let this be plant life, animal life or maybe a bit more jellyfish kind of interaction :) Whatever that means :).

uhm,... as an example there is this video:

TROBLION from stschwabe on Vimeo.

It is a ball that rolls itself into the thick wet mud until the mud is to thick, then it starts to shake the mud of and begins again. This is kind of what I would like to do... create something that can go on on itself (until it runs out of batteries :)).

But that is not all, or maybe: what I want to do is a bit different, here I sketched some initial thoughts... Not that good but I haven’t had a lot of time to think about it :).


They are more machines that react to a person in a lifelike fashion. Instead of just being a machine they will hopefully display some living emotions... no not emotions, the experience should be like that of an encounter with a life being. or something J not completely sure about it yet.

And... I don’t know yet what this would do, in a design kind of way. I mean, I don’t know why this would be necessary, but maybe it shouldn’t be necessary, it is just an exploration into an unknown world for me, so let’s see where we will end up :) Being explorers! yeah1 :)

Ok I guess that this is it for now, so Hopefully I can show something more interesting next week, maybe more drawings, and some more arduino things or stuff..

so ciao! :)

cheers

Friday, January 7, 2011

Holidays

Happy new year!!!!

New year, new opportunities, new ideas and new creations! :) I hope...

anyway, Last weekend I went to Goettingen to see some friends that I met in Lisbon during the awesome age of Erasmus absurdity. And I saw a video lately of a photographer that made a lot of pictures and put them in a movie. Which was awesome:

LA to Santa Cruz to Portland to Seattle and Back from Ian Flanigan on Vimeo.

So I decided that I wanted something similar, just to experiment. So I took my camera and went berserk! well, in the end I found out that I didn't go as berserk as I would wanted to go, but at least it resulted in a lot of pictures. so here is it:

Trip to Goettingen from FrankBorsboom on Vimeo.

Ok ok! I know... It is kind of crappy and stupid since the music cuts off and the images seem to stutter. But I think I just need to do this in a proper video editing software (AE? :) ) and not in Live Move Maker.

That said, expect an updat on this video as it still needs to get better (frame rate, music, all pictures in, all pictures in an angle that makes sense :) ).

See you next time!