This is my
first blog post since my graduation, but before I will talk about that there
has been something that I wanted to post about for a long time. I already
stated it earlier but now it is for sure, I finished my new long board. Las
year I also tried to make a long board, but I didn’t invest too much time or
money into it and it sucked. It bend through way too fast. Also I didn’t have
any money for the wheels and grip tape, So I never used it.
This year I
had more money and with the good weather the urge came to ‘flow’ over the
concrete with the sun on my face. So I decided to first buy the wheels and grip
tape, and then to work on a mold to make the board. So on a national holiday I
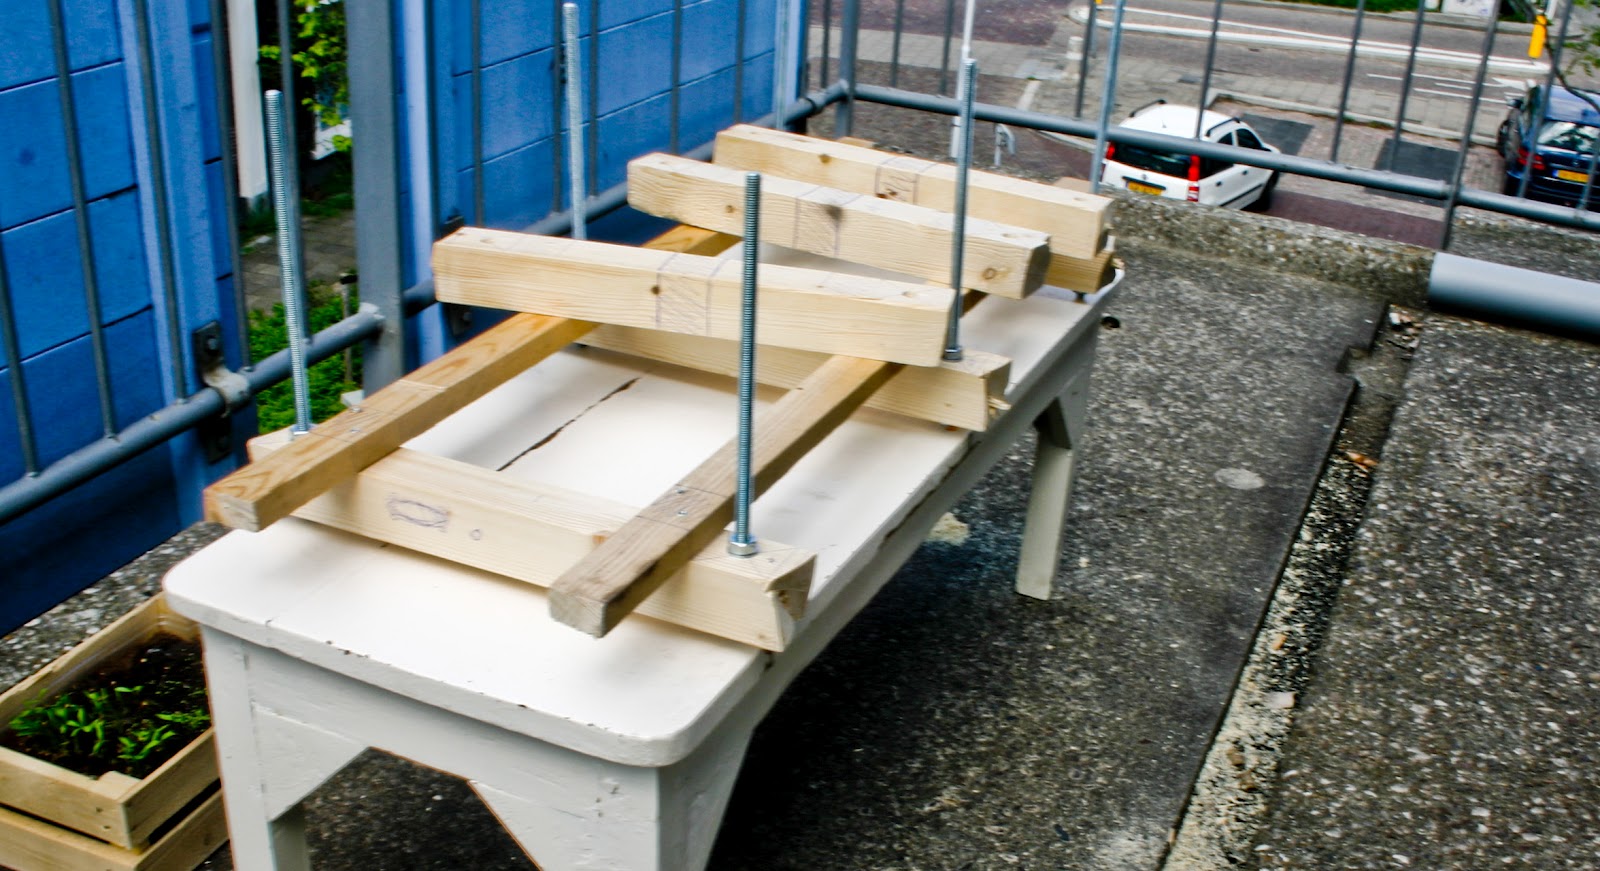
decided to begin immediately. First I needed to cut all the wood for the mold.

I then made
the mold so that the board would be curved in the length. This creates a very
nice stiffness (or so the ‘internet’ says) but it also takes a lot of force to
bend the wooden plates into this curve. To make it easier to bend the wood I
bought 3 multiplex plates of 4mm thick that will make the board. The mold has
two beams on the outside that push the plates up, and there is a beam in the
middle that push the plates down. This will create the curve that we need.
I glued the
plates together with Epoxy that I had left from the first long board. So first
all the wooden plates got a layer of glue and then I put them together on the
mold.

This is
what it all looks like in the mold.

And this is
a detail of the curve, but also a small sketch of how I wanted the finished
product to look.

The collage
here shows the process that came after. First I unscrewed the mold so that I
would be able to take out the board. But no such luck, the epoxy also got
between the mold and long board, so I needed to saw of the long board. Then I
drew up the shape of the board, that I made in illustrator and then printed
out, and later I sawed the shape out of the plank. Then I sanded and shaved the
wood to get a nice finish and to get rid of the remains of the mold and epoxy.

For the
graphics I took inspiration from this video:
Recycling skateboards from pedro vieira on Vimeo.
I created a
(sort of) random pattern and used paper tape to make the pattern and sprayed
the colours on it. Then I used a lacquer to finish it of, but apparently I got
a wrong lacquer that has a ‘cherry’ colour. But in the end it looks alright.
Finally I applied the grip tape and added the trucks and wheels.
And here is the final result :)


I really
like it and I’ve ridden it a lot, but I still need to practice some more. :)
Next week I
will talk about my graduation subject and everything.
Frank
No comments:
Post a Comment